STEP 1
Pick a car, your theme and the corresponding sample photos. I am turning a Volkswagen van into a watermelon van.
STEP 2
Open your van photo in a PSD file, then hit duplicate layer. In the destination section send it to a new document, labeling it something along the lines of 'map'.
STEP 3
In your new document, turn the photo black and white using the shortcut Shift+Ctrl+U.
STEP 4
Go to filter, blur and gaussian blur to a point of around 15, or at least until the shapes take on a fuzzy appearance. However, you don't want to get rid of all the detail, this step is mainly to smooth out imperfections.
STEP 5
Don't forget to save your document! Then close it, we will be ignoring it for about 30 seconds.
STEP 6
Take a nice sample photo of the object or print you are putting on your car. I chose this watermelon because the stripes were going the correct direction.
STEP 7
Open the photo in a new document if you want to - it sort of helps.
STEP 8
Drag the watermelon document into your van document and drop it. Decrease it's opacity with the slide bar and hit Ctrl+T to move it around until the size and shape are how you want it.
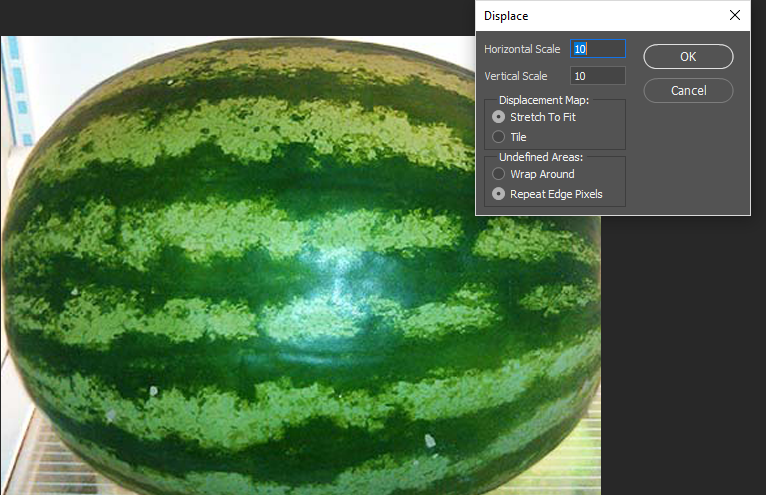
STEP 9
Go to Filter, hit Displace, put in points that are equal, around 10 each. It will take you to your files, find where you saved your maps document and hit it. It will distort, or displace the watermelon to bend around the edges of the car.
STEP 10
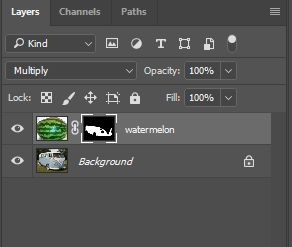
Change filter to Multiply to give a better colour scheme.
STEP 11
Now for the masking. You will find the masking option at the bottom of your Layers window. Hit it. Then take your paint bucket tool, set colour to black, and make the watermelon DISAPPEAR! Go to your paintbrush tool and - making sure its coloured white - paint the sections of the van you want the watermelon print to appear on.
STEP 12
Repeat above steps with other pictures if you want to give your car a bit more flair.
STEP 13
I used several pictures to make the top half pink, and the stripes green.
STEP 14
The final touch was using the same method to paint the VW symbol green.
FINAL PRODUCT


No comments:
Post a Comment