Friday, 27 September 2019

Introduction to HTML Day 1

I have started the course on Code Academy called Introduction to HTML. I completed the first learning module and have learned several elements to coding. I learned how to use tags properly, how to seperate text within my HTML code to keep everything organized, how to link to pictures, how to link to videos, and several cosmetic things relating to those.

The tags I learned about were body tags, div tags, headline tags, paragraph tags, text tags, list tags (both ordered and unordered), image source tags and video source tags.
I also learned how to size both images and videos, and add video controls all within the HTML of a document.

The next thing I will be working on is the second learning module within the course. It has 14 parts and relates to the HTML document standards.

Wednesday, 25 September 2019

Car Skin Customization and Tutorial

STEP 1


Pick a car, your theme and the corresponding sample photos. I am turning a Volkswagen van into a watermelon van.

STEP 2


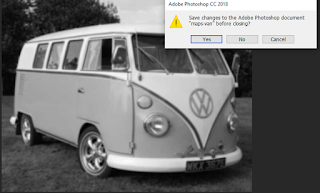
Open your van photo in a PSD file, then hit duplicate layer. In the destination section send it to a new document, labeling it something along the lines of 'map'.

STEP 3


In your new document, turn the photo black and white using the shortcut Shift+Ctrl+U.

STEP 4


Go to filter, blur and gaussian blur to a point of around 15, or at least until the shapes take on a fuzzy appearance. However, you don't want to get rid of all the detail, this step is mainly to smooth out imperfections.

STEP 5


Don't forget to save your document! Then close it, we will be ignoring it for about 30 seconds.

STEP 6


Take a nice sample photo of the object or print you are putting on your car. I chose this watermelon because the stripes were going the correct direction.

STEP 7


Open the photo in a new document if you want to - it sort of helps.

STEP 8


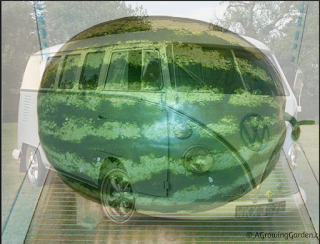
Drag the watermelon document into your van document and drop it. Decrease it's opacity with the slide bar and hit Ctrl+T to move it around until the size and shape are how you want it.

STEP 9


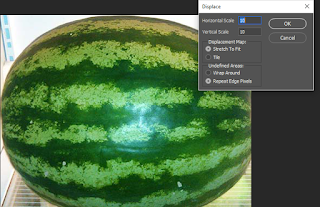
Go to Filter, hit Displace, put in points that are equal, around 10 each. It will take you to your files, find where you saved your maps document and hit it. It will distort, or displace the watermelon to bend around the edges of the car.

STEP 10


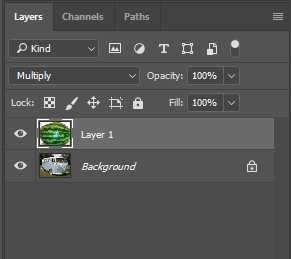
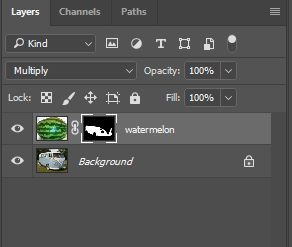
Change filter to Multiply to give a better colour scheme.

STEP 11


Now for the masking. You will find the masking option at the bottom of your Layers window. Hit it. Then take your paint bucket tool, set colour to black, and make the watermelon DISAPPEAR! Go to your paintbrush tool and - making sure its coloured white - paint the sections of the van you want the watermelon print to appear on.

STEP 12


Repeat above steps with other pictures if you want to give your car a bit more flair.

STEP 13


I used several pictures to make the top half pink, and the stripes green.

STEP 14


The final touch was using the same method to paint the VW symbol green.

FINAL PRODUCT


Wednesday, 11 September 2019

Animal Hybrid Tutorials


So you want to morph two innocent animals into some horrifying hybrid creation. That's messed up. Here's how you do it. No, put away the chainsaw, we are doing this with photoshop.

1. Pick your victims. Pick two animals you want to morph. They can be as similar or as different as you want, but keep in mind your skill level and sick interests. I also like to pick a completely seperate background because it just makes life so much easier.

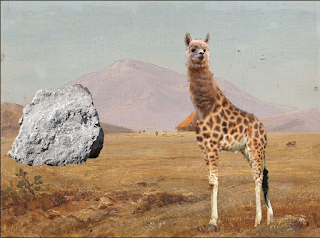
I am making a giraffe with the head of an alpaca. My background is actually a painting of some kind, but I thought it was pretty. 

2. Set your background as the background. Label it background. Congratulations now you have a background! Take your base animal (the body) and put it in the frame. You can label it body if you're very strange. I labeled it giraffe. 

But wait a second, that's not the right background! It's ok, don't cry we can fix it with our magic wand!

3. Cut your body out of the background. Also go right ahead and sever the head; we won't be needing that. 

You could leave it like that if you really wanted to and claim you blended a giraffe and an invisible mole. 

4. Now we put in our second picture; the alpaca. A beautiful animal, really. 

Change the alpacaity (see what I did there) so you can line up the head with your body. Rename the layer so you can keep track of which is which. You don't want your giraffe feet to suddenly become ears, do you?

5. Again we get to use our magic wand, unfortunately it's still for this and not to make hot chocolate. 

 You're going to want to set the alpacity back to 100% and cut out the background and the alpaca's body. It's already looking pretty good, if not a little confused. 

6. You can do smudging and blurring to make it look more realistic, like the scar tissue has already healed and the animal has adjusted to its new circumstances.  

Great! You can barely tell anything has changed and it looks like you spent 3 minutes zoomed in until your eyes crossed for nothing!

7. It's time to do the finishing touches. Using the shortcut Ctrl (or Command) U open up the saturation section and adjust the colours to make it look more natural. You're done! But wait, what's with the misplaced boulder? Is this going to be another dinosaur-era destruction where the universe realized it made a grave mistake? 

Nah, I just thought the canvas looked a little empty. 

8. Add in whatever you think the picture is missing to make it a bit interesting and distract from your abomination (especially if you made any mistakes).


Let's start making your objects look a bit more normal. Since mine is a painting, it gives me some liberty. I merged the rock and background layers and did some smudging and blurring to make the rock look like ti fit in.
On a seperate layer I added smudges of color on the base of the rock that was supposed to look like grass.

9. And you're done! Feel like Dr. Frankenstein yet? Try writing a tutorial on it and then you will for sure!

By Isabella's Herding Cats